
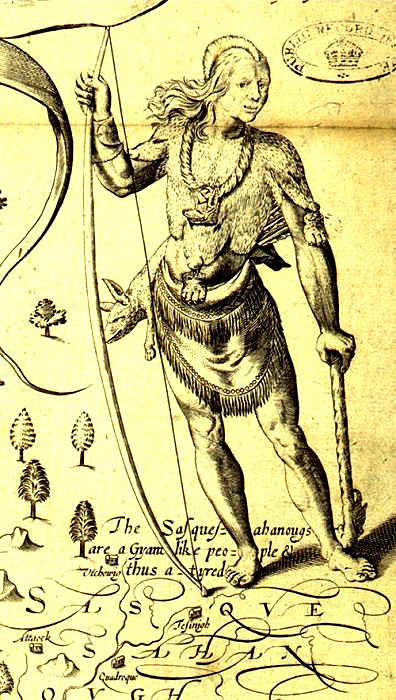
A Susquehannock Indian illustrated on Captain John Smith’s 1608 map of the Susquehanna River from the Chesapeake ranging north into Pennsylvania. These beautiful people were an offshoot of the Iroquois. They were the newcomers. Evidence of early man in Lancaster County dates back some 10,000 years.
Exploring local places along the river, I always kept an eye out for a nice arrowhead or spear point. I haven’t found one yet. They’re not easy to locate anymore unless one gets lucky on one of the islands in the Susquehanna River. Especially after a storm. Trees are up rooted and artifacts may be plentiful. The local farm fields were once prime picking grounds, but times have changed. The farmers don’t till the fields anymore, they disc them and use chemical fertilizer. Many local old time farmers have their own artifact collections.
Having had no success in finding my own example, I was led by my curiosity to see if I could make one myself. The beauty of an ancient worked tool is the wonder of how they did it. After some initial research, I discovered the best, most easily found material, perfect for learning flintknapping, was glass. It makes complete sense. In the early 1800’s, the best quality glass was made from flint, hence its name flint glass. There is no shortage of old glass to be had, old dumps along the many creeks leading into the Susquehanna river are full of old bottles and mason jars and what is the most likely part to remain intact when they break? The thick base of course, which was exactly what I was looking for.
So with glass being easily accessible, my next thought was the tools used for flintknapping. Not something I wanted to purchase, I wanted to make them myself.
Copper FlintKnapping Tools
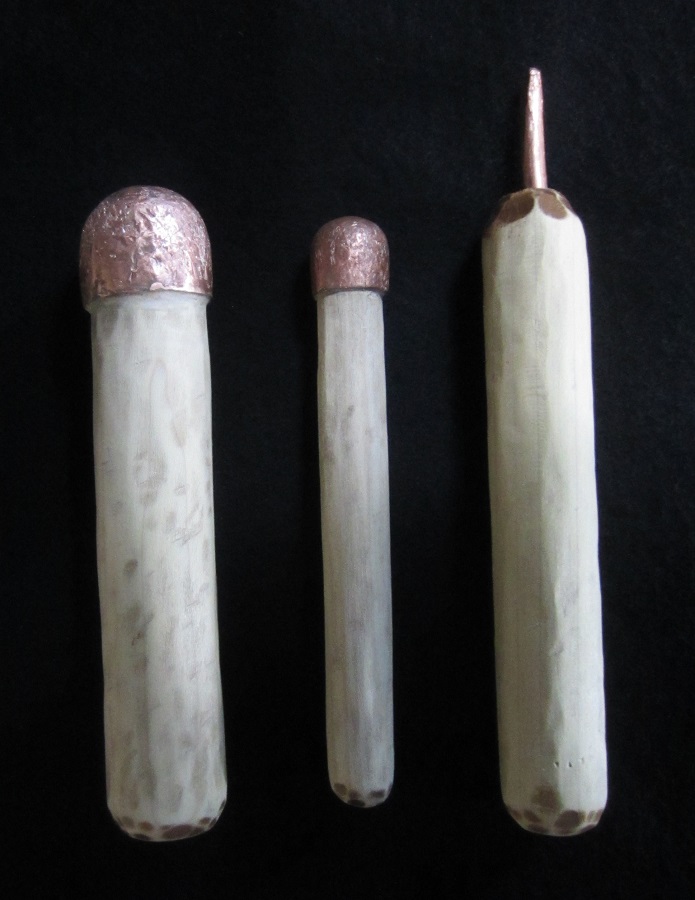
There are a combination of tools used in flintknapping. Shown above is my first set of modern, yet primitive copper tipped tools. The large bopper on the left was made by first peening (hammering) a copper pipe end cap set on the ball end of a large hammer. The business end of the flintknapping piece has to be round. Next was melting a couple of ounces of lead fishing weights with a propane torch into the rounded cap. A six inch piece of light poplar is the handle, which I whittled, giving it that stone age, Fred Flintstone look. The top and handle, attached by resin and hardener stay firmly in place. The smaller one in the middle I call the matchstick; it has a nice feel and is a perfect tool. These are percussion pieces. The ‘Ishi Stick’ on the right is in effect a small hard point on a handle, used for pressure flaking. Instead of striking, it is held to the area and pressed very hard to create a similar effect. The local primitive cultures dating back some 10,000 years used deer antler, hammer stones and hard bone for identical purposes. In modern times, the same results can be achieved by using these very efficient copper tools. Modern flintknappers use both copper and antler. Even myself, as a beginner, found both very useful for specific needs. I started with the copper tools and discovered I like the lighter, more natural feel of deer antler, especially for glass.
Deer Antler Tools
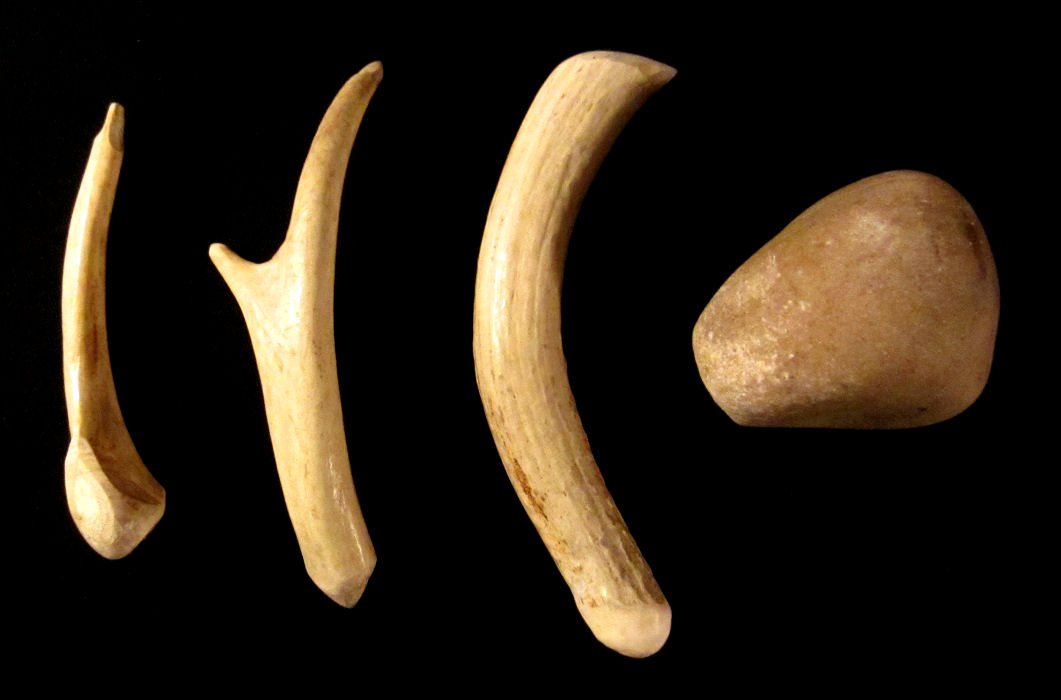
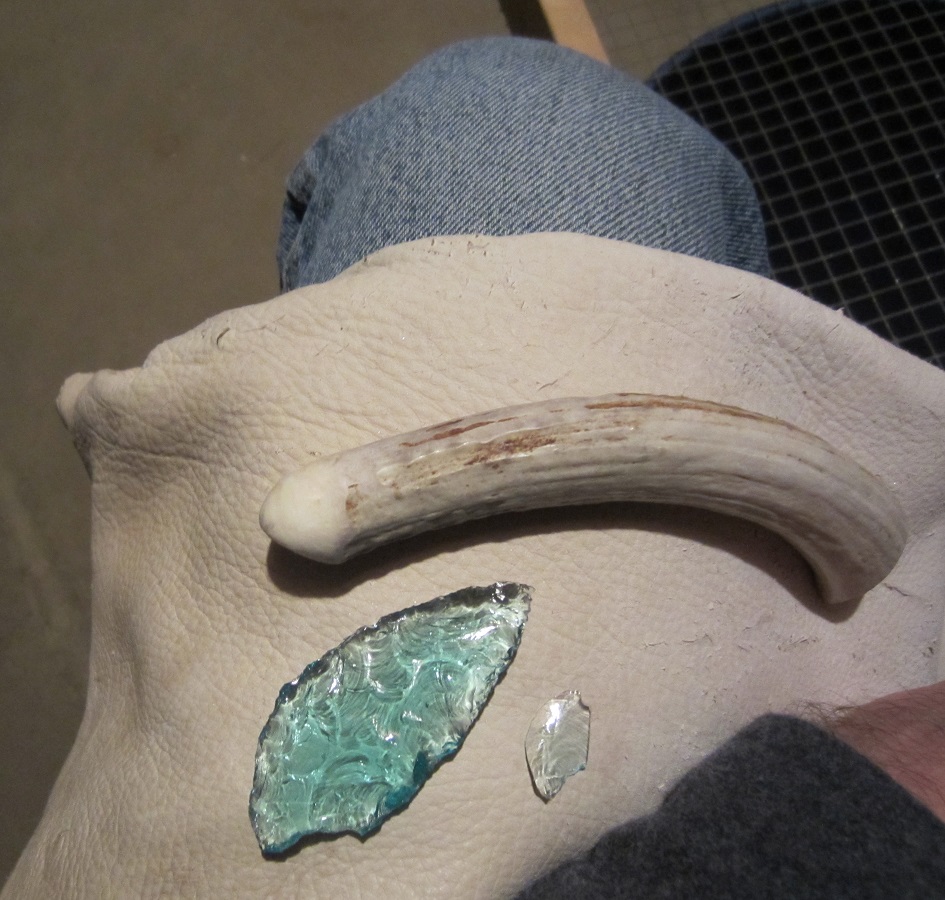
I found a small not too old deer antler rack in an antique store for very cheap. After cutting, then grinding ends into the shapes I needed, I was pleased to have a nice set of antler tools and surprised by how bad grinding antler will stink up a barn. The two smaller pieces on the left are used for pressure flaking. The antler base on the right is my main tool for soft percussion, the rounded striking end is facing down. The hammerstone I use to rough up a cleanly broken bottle or jar base edge, as you can’t just strike a vertical straight clean edge, it must be prepared for an angled strike to flake properly.
Setting Up Shop
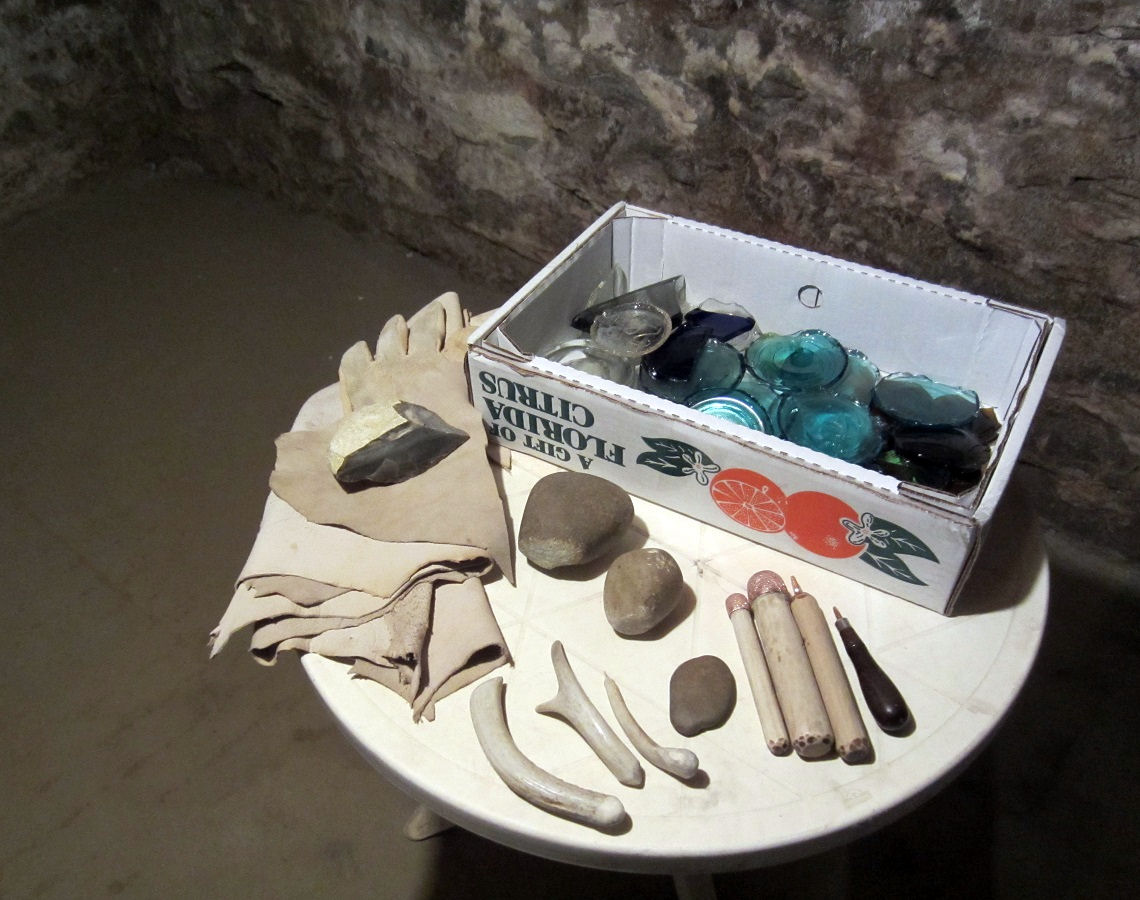
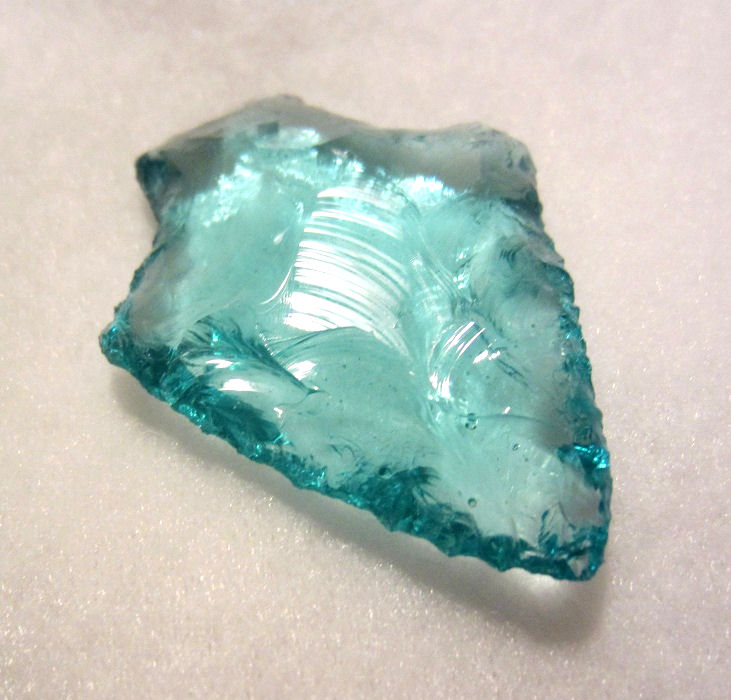
A cozy corner of the basement provides all I need, easy to clean and takes up very little space. A box flat of a variety of glass bases includes old mason jar bases in a beautiful aqua, amber beer bottle bases, and clear soda bottle bases. I grab whatever strikes me.

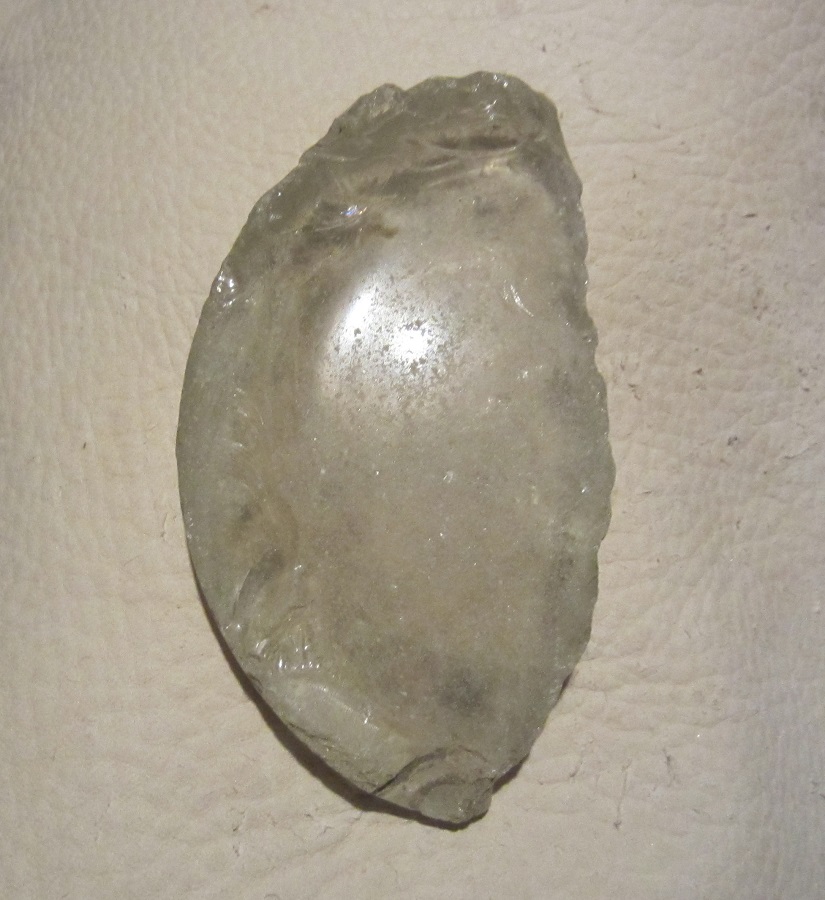
My first real point. Painstakingly completed in 2 hours, this was originally a clear soda bottle base. I like the very paleolithic look of it, especially photographed in silhouette.
1900’s Milk Bottle Base
Not exactly a beautiful sight to behold, likely something you’d simply kick out of the way. Yet this 4″ scrap of old creek worn glass ended up having potential, more than I thought. I found it along a bank of Shawnee Run.
 After having worked the piece down through what is known as lithic reduction using my deer antler tool, this percussion flaked bi facial preform is coming along just fine. Any of my strikes if done incorrectly would have broken it in pieces. (Which I have done many times before.) The effect I am trying for is to flake all the original smooth surface from the piece while reducing its size as little as possible. Striking down at the right spots along the edge produces a flake removal across the bottom of the piece. So when you strike, the flake comes off and then you flip the piece over and do the same. I found that you want to strike the low spot, which is the high spot on the reverse side, you end up with a wavy edge that gives you multiple places to work the piece. You have to be careful, as every time you strike the piece, you make it smaller. The reduction has to be controlled and precise as possible.

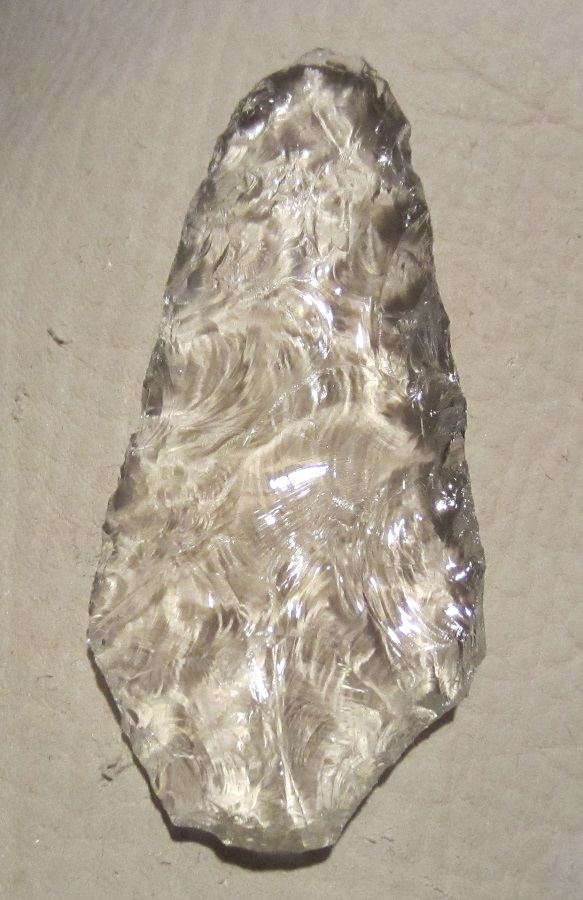
If you’re careful and lucky, the above long point is quite a nice result. Too large for an arrow, this is perfectly functional for a spear. The reduction from the 4″ original piece of junk glass to this 2-1/2″ x 1″ spear point isn’t a bad ratio.
Mason Jar Point
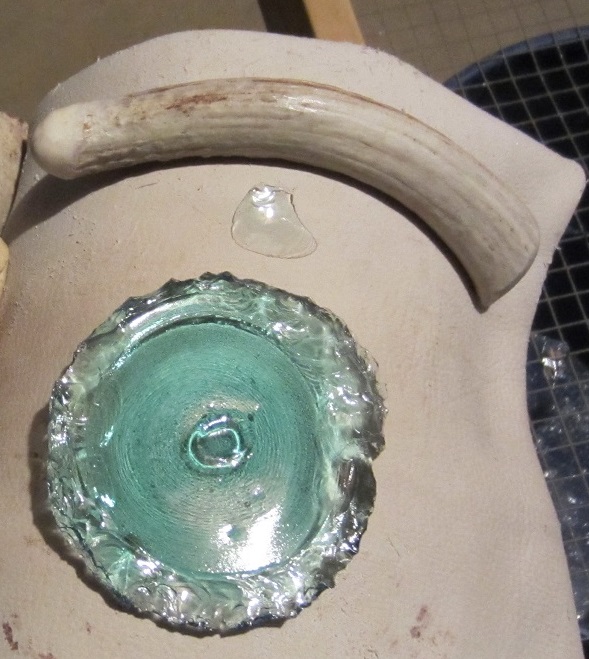
A prepped edge flaked base showing the most recent flake to come off. To work this in and flake the entire surface down from it’s smoothness will reduce this base by quite a bit. I found it very relaxing. When learning something new, the laser focus is incredible.
A little more knapping. Now it’s a nice bi facial preform. One thing I noticed is the energy effect; like a stone tossed into a pond, ripples are created by the impact. In solid matter like glass it’s the same, but the ripples stay frozen in place.
Almost there. Down to pressure flaking to shape and sharpen the tip and edges. The base just needs a trim.

So there it is. Both beautiful and very functional.
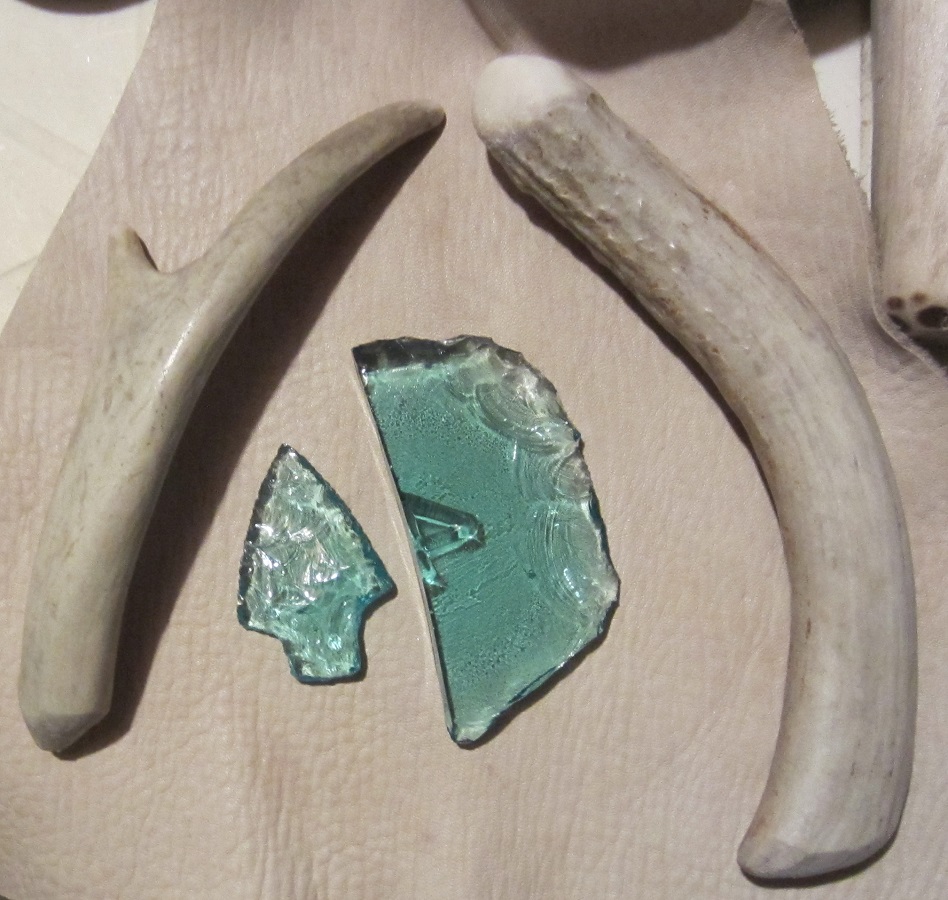
Sometimes, (more often than not) when prepping the base, it will split in half. The half with the embossed number 4 is still a good candidate for a smaller point. The only problem is to get that straight clean break workable. Striking the flat clean edge will only break the piece further. You have to find your way into the edge by starting at a low spot and working the edge down. And what about that embossed 4? That’s gotta come off.
After a bit of patience and relaxing focus, another pretty point emerges.
The Cobalt Vase Base
I bought a pretty cobalt vase for $2.00 and smashed it to bits for its base.
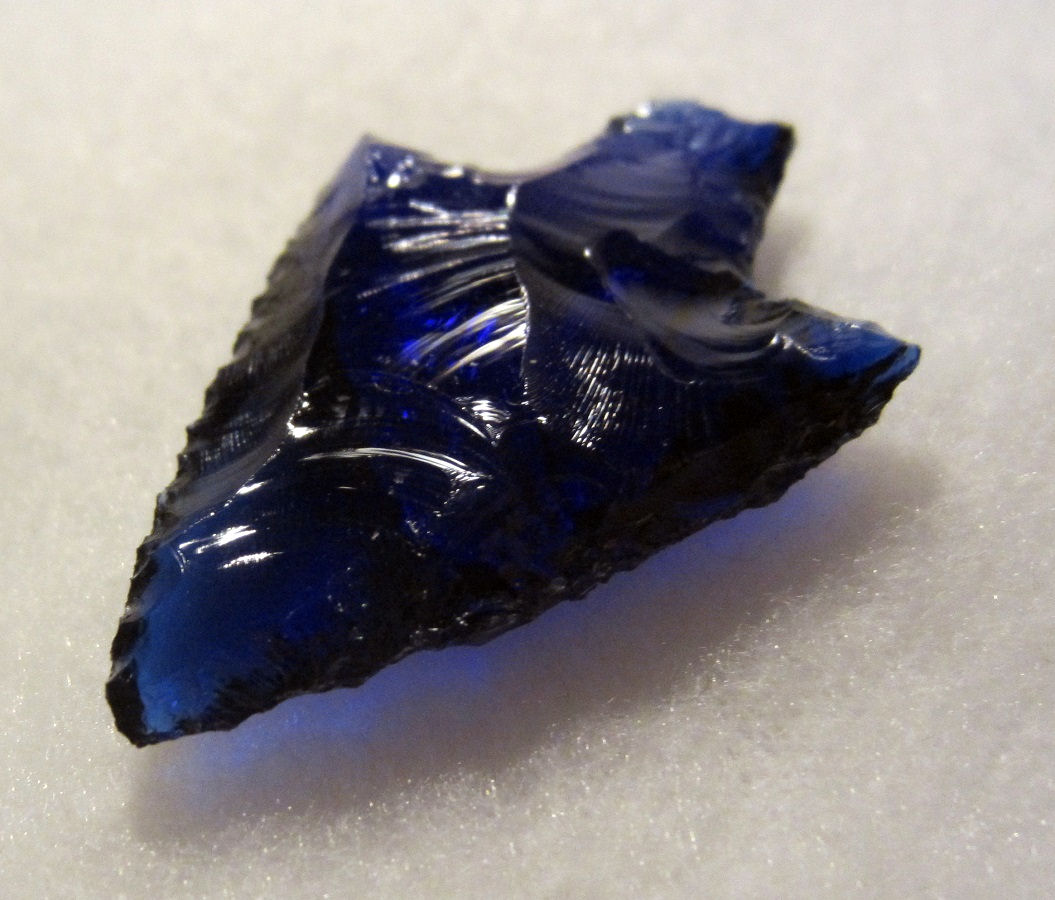
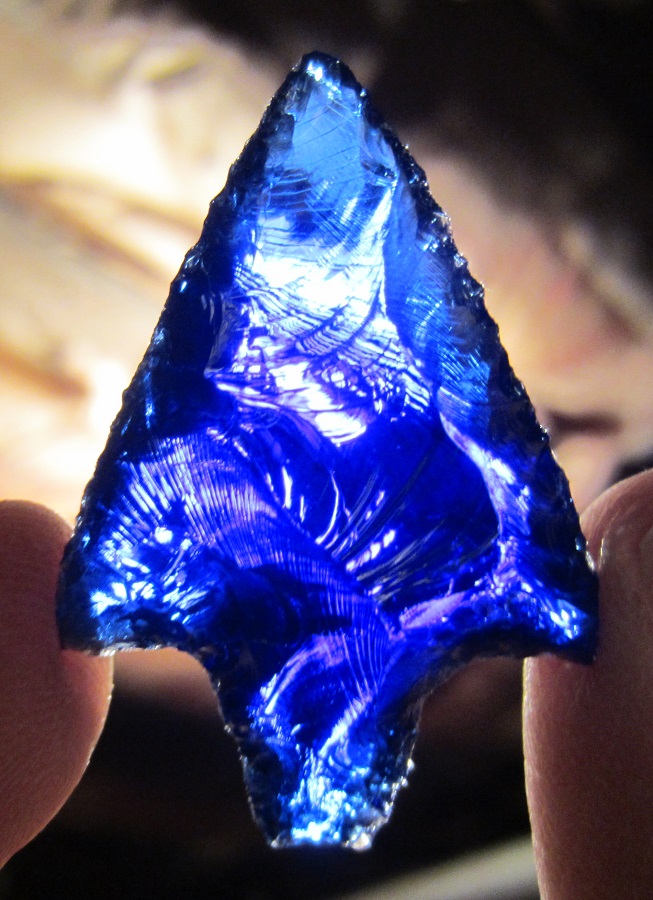
This cobalt glass itself was new and a bit harder, the flaking had a different look to it. It wanted to break more than flake. Still a beauty and I don’t want my money back.
A Modern Beer Bottle Base
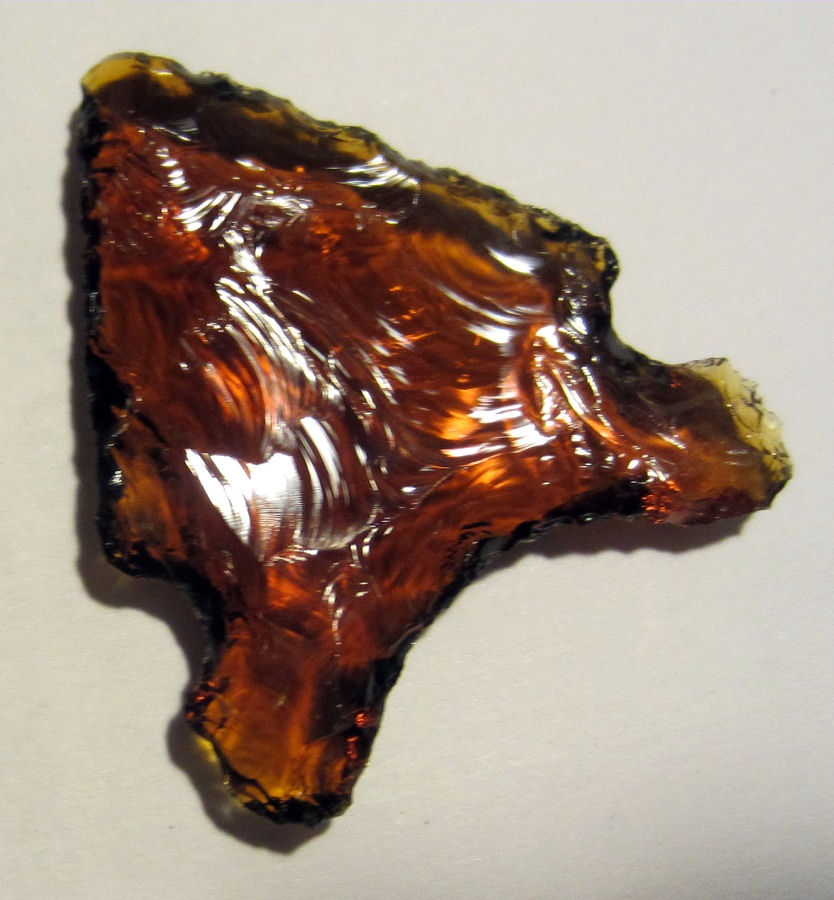
This one ended up wide, so I just went with it. I like the barbed effect. This arrowhead will hunt.
The Bear Mistake
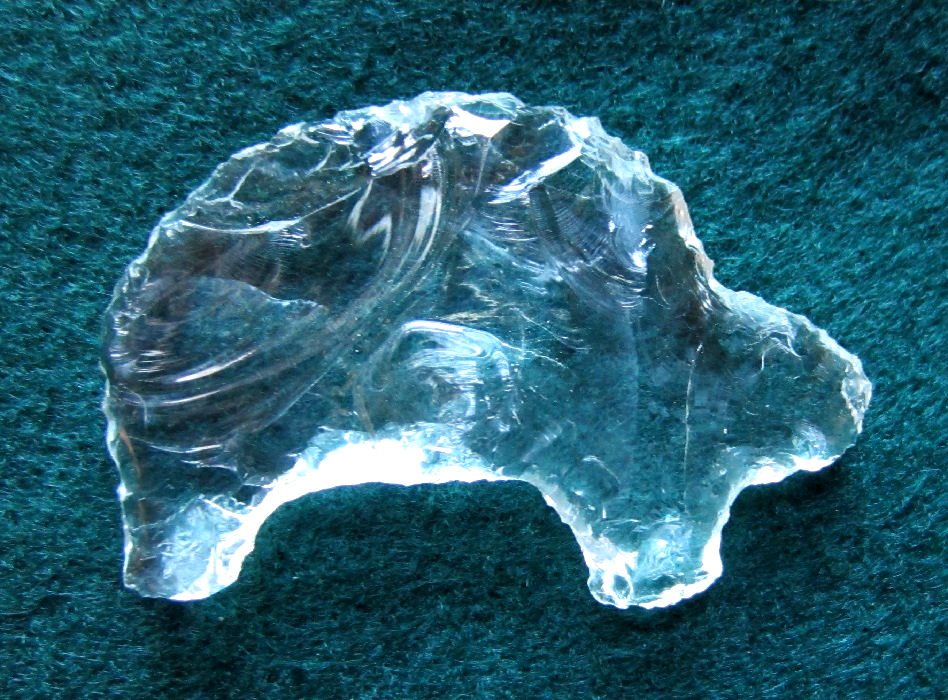
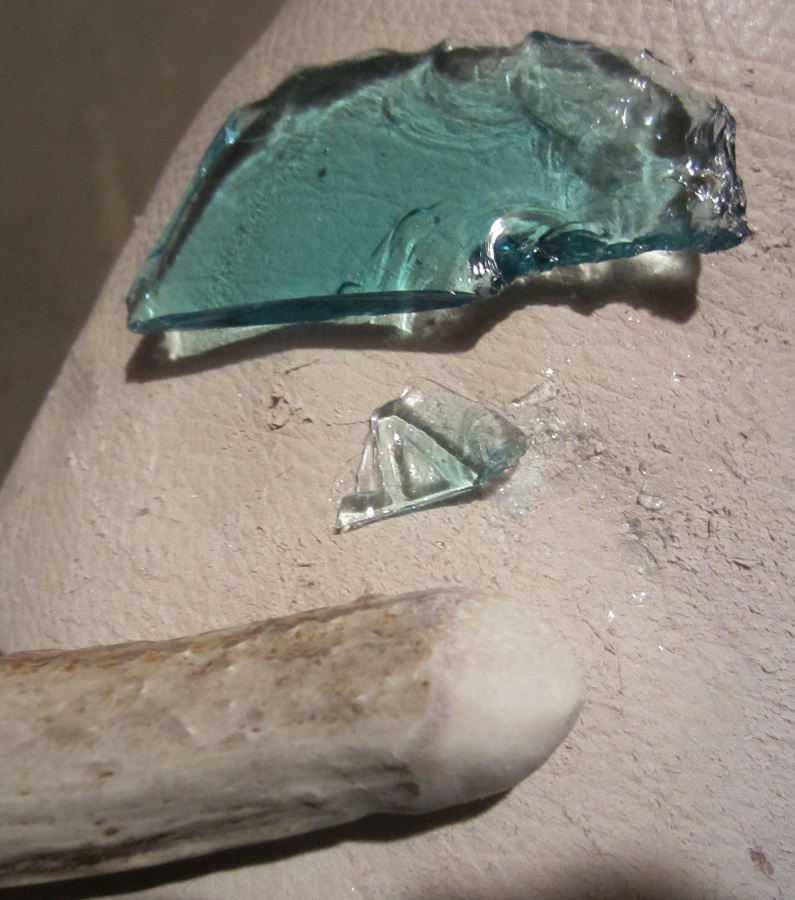
Sometimes a strike can be too hard, resulting in a flake too deep as seen on the upper left. There’s not much choice but to make a bear.
Lighting Them Up
The clear points were not only fun to make, but also fun to photograph in silhouette. Then I realized adding color made them even more attractive.
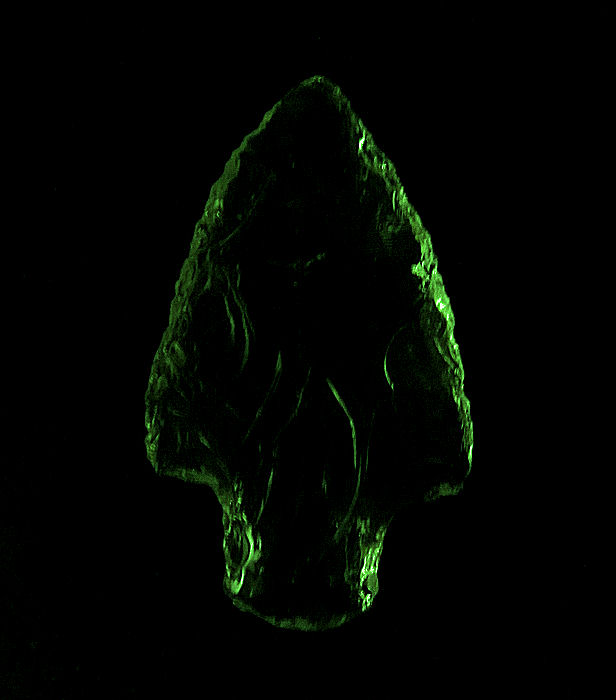
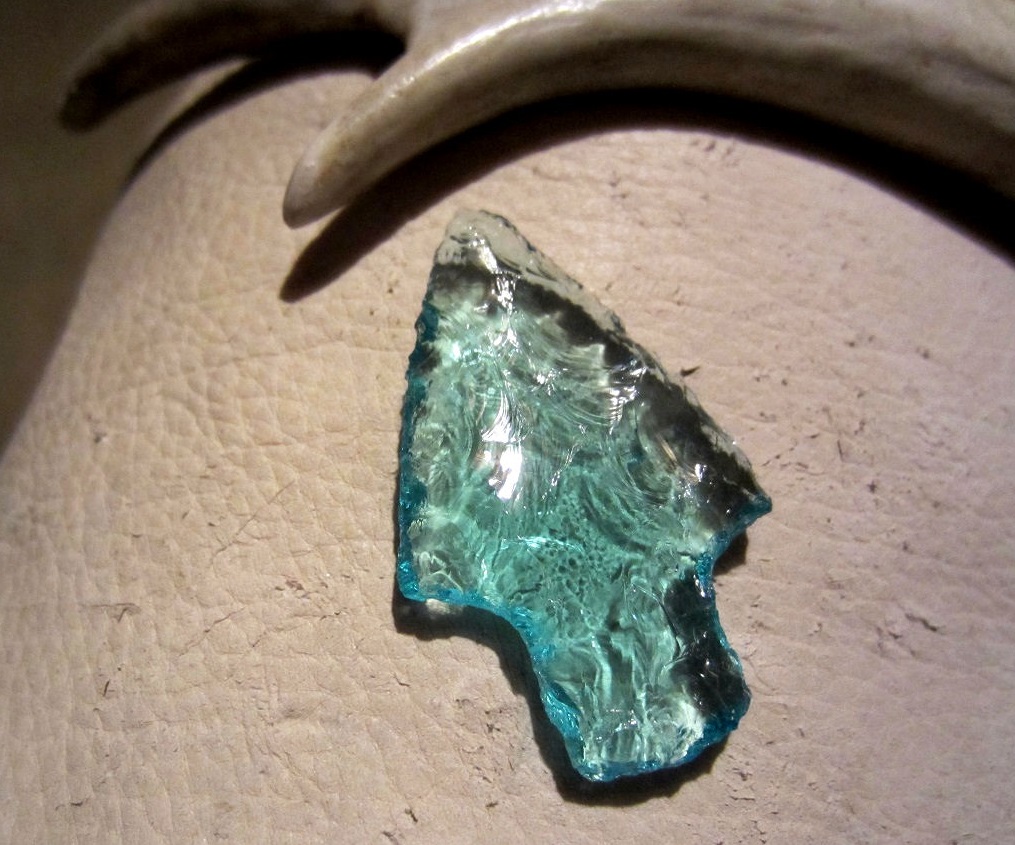
My first point in a beautiful green.
Someone once told me they found an arrowhead that looked just like a Christmas tree. I wonder if it looked like this?
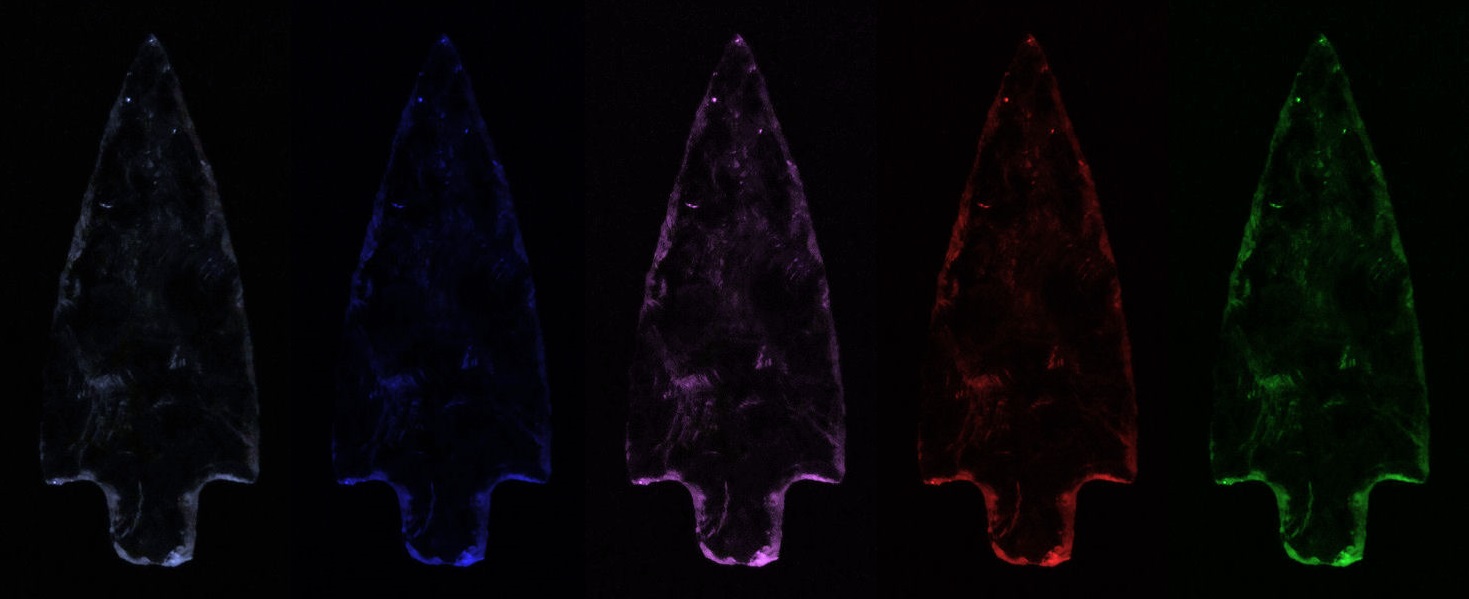
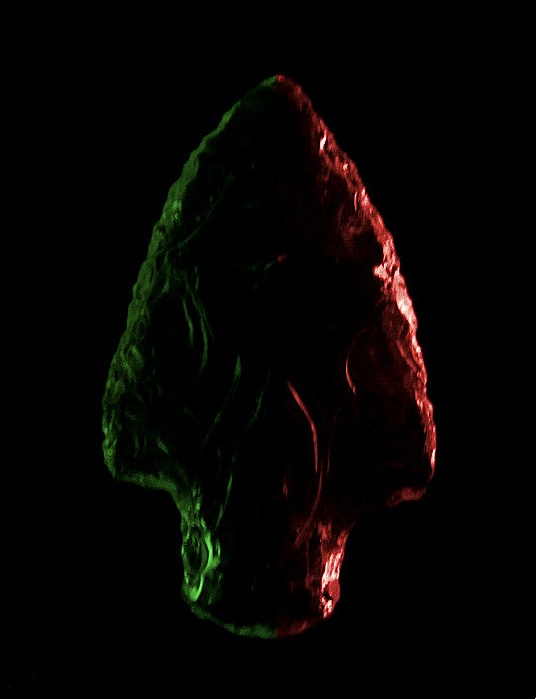
The long point in a color run.
Creating is fun.
I’ve made my point clear.